From PuTTY's home page (above) it should be clear where to click to download "You can download PuTTY her." Navigating to the download page from the main page displays:
Those still using 32-bit Windows are getting rarer. Since I am using 64-bit Windows so I click on the putty-64bit-0.69-installer.msi link:
Save the MSI and then run it to install PuTTY:
Click "Run" to run the installer:
As in the case with any installer keep clicking the "Next" button:
Click "Next" unless you want to go rogue and change the default install location:
Pick the desired features and then click "Install:"
The status screen will churn away while PuTTY installs (hence Next is not enabled). Once install finishes the following is displayed:
On the final screen click "Finish."
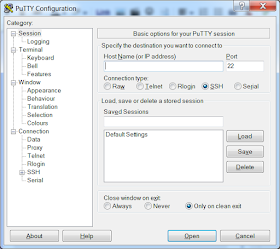
Run PuTTY as you would any Windows application:
Under Port in the PuTTY screen the value is set to 22, the default for port for SSH. To access a machine such as our Ubuntu Virtual machine from Opening an inbound port for an Ubuntu Virtual Machine on Azure enter the machine IP address in the "Host Name (or IP address):"
Click on Open to access the machine specified which displays the following screen:
Enter the username and password for the remote host:
Click Enter and the user name and password will be used to authenticate SSH access to the host:
A Windows user now has access to a remote server.


No comments:
Post a Comment